In this article, we will explore the process of changing and customize the saved file name in Viewer. The ability to customize the file name can be a helpful feature, especially when you want to organize your files in a specific way or make them more descriptive. By following a few simple steps, you can easily change the saved file name to better suit your needs. We will also discuss best practices for choosing an appropriate file name.
Steps:
Step 1: Open the Viewer Administrator
The first step to changing the saved file name in Viewer is to open the Viewer Administrator.
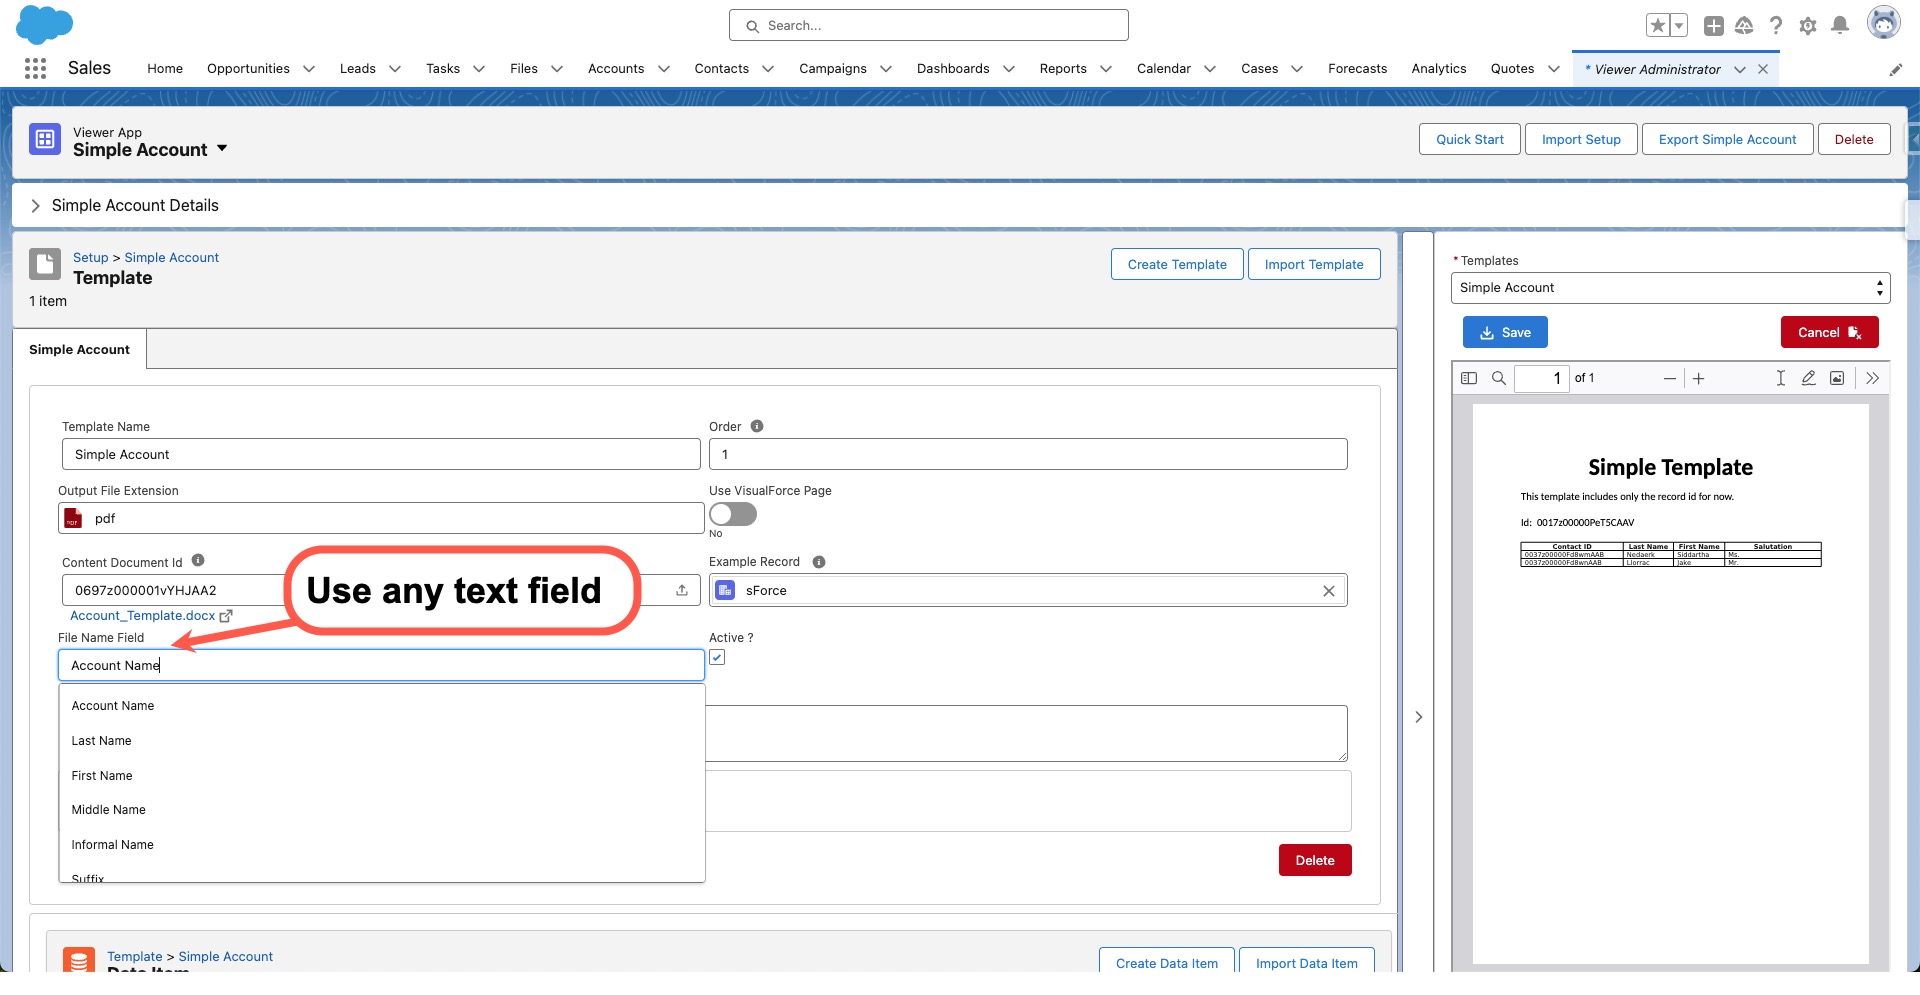
Step 2: In your template select the require field for File Name
Once you have successfully accessed the Viewer Administrator, the next step is to select the new field for the file name.
Look for the "File Name Field" in the template section. This field is based on the text fields on your primary . Select the desired option and save the changes.
Step 3: Test Your Change
After making the necessary modifications in the Viewer Administrator, it is important to test your change to ensure that it is working as intended. This will allow you to verify that the new file name is being applied correctly and that it meets your requirements.
Best Practices for File Name use text formula field
- Create a text formula field , use this field to create any name convention you wish to apply - make sure to provide permission to all users
- Make the file name unique
- Using formula use date + time
- Add some counter identifier to the formula
- Make sure the name is valid , not valid names will prevent the file from been saved